
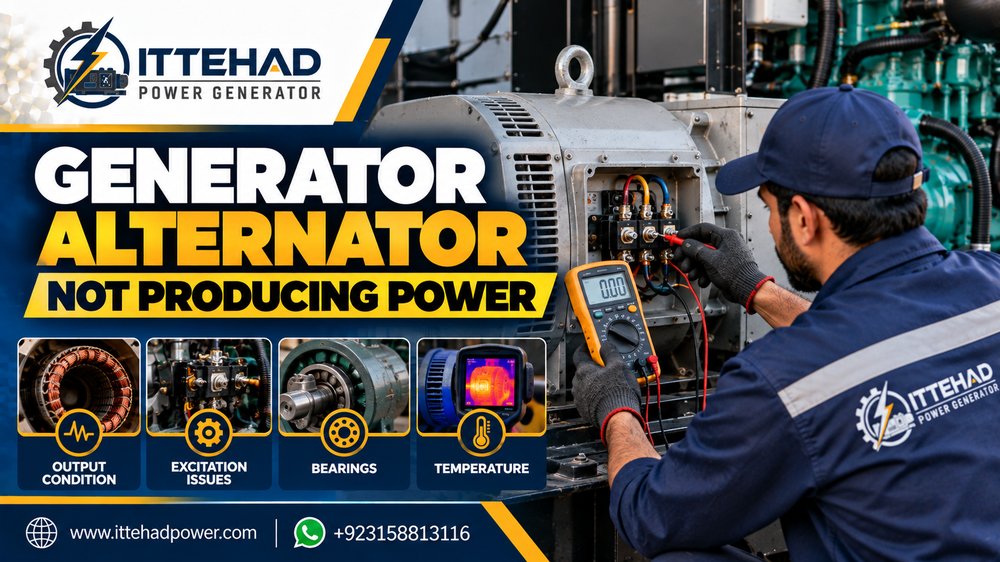
When a generator alternator not producing power problem occurs, the engine may continue running normally while little or no usable electrical output reaches the connected system. The cause can involve loss of excitation, AVR failure, damaged sensing circuits, winding faults, rotating rectifier problems, loose terminals, breaker issues, bearing or rotor problems, overheating, or deteriorated electrical insulation. A systematic inspection of voltage output, excitation, alternator condition, temperature, bearings, wiring, and electrical connections helps commercial and industrial generator users identify the actual fault, avoid unnecessary component replacement, and restore dependable generator performance.
Why Alternator Power Generation Is Important
The alternator converts the generator engine’s mechanical rotation into electrical power. The engine can therefore start, run smoothly, and reach normal operating speed while the generator still provides no usable electricity if the alternator or its related electrical systems develop a fault.
Loss of electrical output should be diagnosed promptly because continued operation may not correct the problem and can allow overheating, loose connections, excitation faults, or internal alternator damage to become more severe.
Generator Alternator Not Producing Power: Where Diagnosis Should Begin
A generator alternator not producing power fault should be approached in a logical sequence. Technicians should first confirm whether the alternator is producing absolutely no voltage, very low residual voltage, unstable voltage, or normal voltage that is failing to reach the connected load.
This distinction helps separate internal alternator problems from breaker, cable, or downstream electrical connection faults.
Initial Diagnostic Questions
- Is the generator engine running at normal speed?
- Is frequency correct?
- Is any voltage present at the alternator terminals?
- Is the main breaker closed and functioning?
- Is voltage present before the breaker but absent after it?
- Are any control-panel warnings displayed?
- Did the fault appear suddenly or gradually?
- Did the problem begin after maintenance or electrical work?
- Does the alternator show signs of overheating or unusual noise?
Confirm Engine Speed Before Alternator Repair
The alternator requires correct rotational speed to generate the expected electrical frequency and support normal voltage production. If the engine is running too slowly, the electrical output may be low or abnormal.
Frequency should therefore be measured before the alternator is assumed to be defective. A speed-related problem can sometimes appear to be an alternator or AVR fault.
Check Whether Any Voltage Is Present
Measuring alternator output provides an important starting point. A complete absence of voltage suggests a different set of possible faults from a generator that still produces a small residual voltage.
If some voltage is present but significantly below normal, excitation, AVR, sensing, or winding problems may require closer attention.
No Voltage at the Alternator Terminals
If no meaningful voltage is present directly at the alternator output terminals, the fault is likely to involve excitation, internal alternator components, winding continuity, rotating rectifiers, brushes or slip rings where applicable, or associated control wiring.
Internal electrical testing should be performed by qualified personnel because generator alternators can contain hazardous electrical energy and stored magnetic or electrical effects.
Voltage at Alternator but No Power at the Load
If correct voltage exists at the alternator terminals but connected equipment receives no power, the alternator itself may be functioning normally.
The diagnostic focus should then shift toward the output breaker, cable connections, distribution path, switching arrangement, and load-side electrical connections.
Downstream Areas to Check
- Main output breaker
- Breaker terminals
- Power cable connections
- Cable continuity
- Distribution terminals
- Switching arrangement
- Damaged or loose cable lugs
Main Generator Breaker Problems
A damaged, open, tripped, or poorly connected breaker can interrupt power even when the alternator is producing normal voltage.
The breaker should be inspected for physical damage, loose terminals, repeated tripping, heat discoloration, and correct mechanical operation.
Automatic Voltage Regulator Failure
The automatic voltage regulator controls excitation and helps maintain the required generator voltage. If the AVR fails completely, the alternator may produce little or no usable voltage depending on its design.
Possible AVR-Related Signs
- No normal voltage build-up
- Only low residual voltage present
- Voltage disappears after previously being stable
- Burned or damaged AVR components
- Loose regulator connections
- Damaged sensing wires
- No appropriate excitation output where testing confirms it
The AVR should be tested rather than replaced automatically because other excitation faults can create similar symptoms.
AVR Sensing Circuit Problems
The AVR depends on correct voltage sensing to regulate alternator output. A disconnected, loose, burned, or damaged sensing wire can prevent proper regulation.
Inspection should include sensing terminals, wiring continuity, connectors, and signs of overheating or corrosion.
Loss of Generator Excitation
The alternator needs a magnetic field to generate electrical power. If excitation is lost, the alternator may produce only a very small voltage or none at all.
Loss of excitation can involve the AVR, exciter, field circuit, rotating rectifier assembly, residual magnetism, brushes and slip rings where applicable, or associated wiring.
Residual Magnetism Loss
Some alternators depend on residual magnetism to begin building voltage. If this magnetic field becomes too weak, normal voltage may fail to develop after startup.
Residual magnetism should be considered only after other basic checks are completed because several electrical faults can produce the same no-output symptom.
Exciter Faults
Brushless alternators commonly use an exciter to create the field current required by the main rotor. If the exciter winding, connections, or related components fail, normal alternator output may disappear.
Exciter diagnosis may require resistance, continuity, and electrical measurements according to the alternator design.
Rotating Rectifier Failure
Rotating rectifiers convert exciter output into the field current needed by the main rotor in many brushless alternator designs. Failed diodes can prevent proper excitation and result in low or zero output.
Possible Rotating Rectifier Symptoms
- No voltage build-up
- Very low output voltage
- Poor voltage response
- Alternator overheating
- Repeated excitation faults
- Output failure after previously normal operation
These components should be tested carefully using appropriate electrical procedures.
Brush and Slip Ring Problems Where Applicable
Some alternators use brushes and slip rings to supply field current. Worn brushes, damaged brush holders, contaminated slip rings, weak spring pressure, or poor electrical contact can interrupt excitation.
This can produce intermittent output, low voltage, sparking, or complete loss of generated power.
Main Rotor Winding Problems
The rotor winding creates the magnetic field used by the main alternator. An open circuit, shorted turns, damaged insulation, or failed connection can prevent normal voltage generation.
Rotor problems normally require electrical testing after external excitation components have been checked.
Stator Winding Problems
The stator windings produce the main electrical output. Open windings, short circuits, insulation deterioration, burned sections, or loose internal connections can result in partial or complete power loss.
Possible Stator Fault Indicators
- No output on one or more phases
- Very low voltage
- Electrical burning smell
- Discolored windings
- Alternator overheating
- Abnormal resistance readings
- Low insulation resistance
Alternator Winding Continuity Testing
Continuity and resistance measurements can help identify open windings or abnormal differences between electrical circuits.
Because winding resistance can be very low, measurements should be made with suitable equipment and interpreted carefully.
Insulation Resistance Problems
Alternator insulation separates electrical conductors from the frame and other circuits. Heat, moisture, dust, age, contamination, and electrical stress can reduce insulation quality.
Low insulation resistance can lead to leakage, protection trips, unstable output, or complete electrical failure.
Moisture Inside the Alternator
Moisture can lower insulation resistance and contribute to corrosion of electrical components. Generators that remain unused for long periods or operate in damp conditions may be more vulnerable.
If moisture is suspected, the alternator should be inspected and tested before normal electrical load is applied.
Dust and Contamination
Dust can accumulate around windings, ventilation openings, terminals, and internal components. Combined with moisture or oil, contamination can reduce cooling and insulation reliability.
Alternator cleanliness should therefore form part of regular generator maintenance.
Alternator Overheating Before Output Failure
Loss of power may be preceded by excessive alternator temperature. Overloading, poor ventilation, winding faults, weak electrical connections, bearing problems, or excitation issues can increase heat.
Repeated overheating can damage winding insulation and eventually cause complete output failure.
Signs of Alternator Overheating
- Electrical burning smell
- Darkened windings
- Discolored terminals
- Melted insulation
- Hot alternator housing
- Voltage instability before output disappears
Restricted Alternator Ventilation
Alternators require airflow to remove electrical heat. Blocked ventilation openings, heavy dust buildup, poor generator-room airflow, or damaged cooling components can increase temperature.
Cooling paths should remain clear, especially during extended operation or high electrical demand.
Alternator Bearing Problems
Bearings support the rotor and maintain correct mechanical alignment. A failing bearing can increase vibration, create mechanical resistance, allow rotor movement, or eventually cause internal contact.
Bearing Warning Signs
- Grinding noise
- Rumbling sound
- High-pitched bearing noise
- Excessive vibration
- Localized heat
- Rough rotation
- Mechanical play
Can Bearing Failure Stop Electrical Output?
Severe bearing wear can affect rotor alignment and allow internal alternator components to rub or contact each other. This can damage windings, reduce reliable rotation, or cause complete alternator failure.
Mechanical symptoms should therefore be investigated early rather than treated as unrelated noise.
Rotor and Stator Contact
If the rotor contacts the stator because of bearing or alignment problems, the alternator can develop rapid internal damage.
Scraping noise, excessive vibration, metal contact sounds, or sudden output failure can indicate a serious mechanical problem that requires immediate inspection.
Coupling and Mechanical Drive Problems
The alternator must receive mechanical rotation from the engine. A damaged coupling, loose mechanical connection, or alignment problem can prevent normal power generation even though the engine itself runs.
Mechanical drive should be inspected if alternator rotation or alignment appears abnormal.
Loose Alternator Terminals
Loose output terminals can create high resistance, heat, intermittent output, and eventual connection failure.
Terminals should be checked for tightness, discoloration, damaged cable lugs, melted insulation, or corrosion.
Burned Cable Lugs and Connections
A cable lug that becomes overheated may lose reliable electrical contact. In severe cases, the connection can fail completely and interrupt power delivery.
Repair should include identifying why the connection overheated rather than replacing only the visibly damaged part.
Control Wiring Faults
Generator control wiring can influence excitation, sensing, breaker operation, and fault protection. Loose connectors, damaged wires, or incorrect reconnection after maintenance can prevent normal alternator output.
The control circuit should be reviewed if the problem appeared after electrical repair or wiring work.
Output Failure After Generator Maintenance
If the generator stopped producing power immediately after service, recent work should be reviewed carefully. A disconnected sensing wire, loose alternator cable, incorrect AVR connection, open breaker, or incomplete control connection may be responsible.
Checking recent changes can save time before deeper alternator disassembly begins.
Output Failure After Long Storage
A generator that has remained unused for an extended period may experience weakened residual magnetism, moisture contamination, corroded terminals, or deteriorated electrical connections.
A complete electrical inspection should be performed before assuming that the alternator needs major repair.
Output Failure After Overloading
Severe or repeated overload can increase alternator current and temperature. This may damage windings, rectifiers, AVR components, terminals, or protective devices.
If power loss occurred immediately after heavy electrical demand, the actual load and alternator condition should be reviewed together.
Phase-Specific Output Failure
On applicable multi-phase generators, one phase may lose output while others continue producing voltage. This can indicate a winding fault, loose terminal, damaged breaker contact, cable problem, or internal connection failure.
Each phase should be measured separately to identify whether the fault is inside the alternator or downstream.
All Phases Showing No Output
When all phases show little or no voltage, common areas of interest include the excitation system, AVR, rotating rectifiers, residual magnetism, rotor field, or a shared alternator connection.
Frequency and engine speed should still be verified before internal electrical testing proceeds.
Low Residual Voltage but No Normal Build-Up
A small voltage at the alternator terminals can indicate that the main windings still have some electrical response but excitation is not building normal output.
This observation can help direct diagnosis toward AVR, excitation, residual magnetism, or field-system problems.
Generator Produces Power Intermittently
Intermittent output can result from loose terminals, unstable excitation connections, worn brushes, damaged control wiring, vibration-related faults, or heat-sensitive electrical components.
The generator should be observed under controlled conditions to identify whether movement, temperature, or electrical load causes the output to disappear.
Power Disappears After the Generator Warms Up
Some faults are temperature-related. Electrical resistance changes, weak solder joints, failing AVR components, winding deterioration, or loose connections may become worse as the alternator heats.
If output is normal when cold but disappears later, temperature should be included as a key diagnostic condition.
Electrical Burning Smell
A burning electrical smell can indicate severe overheating of windings, insulation, terminals, rectifiers, or other alternator components.
The generator should be shut down and inspected rather than operated until complete failure occurs.
Visible Smoke From the Alternator
Smoke from the alternator area can indicate serious electrical overheating or insulation damage. Continued operation can significantly increase repair requirements.
The generator should be isolated and professionally inspected before it is restarted.
Unusual Alternator Noise
Grinding, scraping, rattling, or rubbing sounds may indicate bearing problems, loose internal parts, rotor contact, or mechanical misalignment.
Electrical output problems combined with unusual mechanical noise require both electrical and mechanical inspection.
Excessive Alternator Vibration
Vibration can result from bearing wear, rotor imbalance, poor alignment, loose mounting, or coupling problems. It can also loosen electrical terminals and wiring over time.
A sudden increase in vibration should be investigated before the alternator is returned to normal service.
Systematic Alternator No-Output Diagnosis
A logical troubleshooting sequence can reduce unnecessary parts replacement and shorten repair time.
- Confirm engine speed and frequency.
- Measure voltage at the alternator terminals.
- Check whether residual voltage is present.
- Inspect the main breaker and output path.
- Check alternator output terminals and cable lugs.
- Inspect AVR and sensing connections.
- Evaluate excitation output where appropriate.
- Test rotating rectifiers or brushes where applicable.
- Check rotor and stator winding continuity.
- Test insulation condition where required.
- Inspect bearings, vibration, and mechanical alignment.
- Repair the confirmed fault and retest output.
Why the AVR Should Not Be the First Assumption
AVR faults are common in voltage-related troubleshooting, but replacing the regulator without testing can waste time and money.
No-output symptoms can also come from failed rectifiers, open field windings, sensing problems, breaker faults, damaged terminals, lost residual magnetism, or internal alternator faults.
Why the Complete Alternator Should Not Be Replaced Immediately
A no-power condition does not automatically mean the complete alternator has failed. Some faults may be limited to a regulator, connector, excitation component, breaker, diode, or wiring problem.
Accurate diagnosis can determine whether targeted repair is practical before major replacement is considered.
Benefits of Proper Alternator Fault Diagnosis
- Reduced unnecessary replacement: Individual faults can be identified before replacing the complete alternator.
- Lower downtime: A structured sequence helps narrow the problem efficiently.
- Better repair accuracy: Corrective work is based on electrical and mechanical testing.
- Improved generator reliability: The underlying cause can be corrected rather than temporarily bypassed.
- Better cost control: Serviceable components are not replaced without evidence.
- Improved equipment protection: Overheating, winding damage, and mechanical wear can be identified earlier.
- Greater operating confidence: Alternator output can be verified after repair.
What Commercial and Industrial Generator Users Need
Commercial and industrial users need a clear answer when a generator engine runs but no electrical power is available. They need to know whether the problem is internal to the alternator or located in the AVR, excitation system, breaker, cables, or connected electrical path.
A professional diagnostic service should explain the confirmed fault, recommended repair, replacement parts if needed, and the testing required before the generator returns to service.
How to Select an Alternator Diagnosis and Repair Service
Alternator no-output faults should be handled by technicians familiar with generator voltage systems, AVR operation, excitation, winding testing, insulation testing, bearings, and safe electrical measurements.
- Ask whether alternator terminal voltage will be measured.
- Confirm that generator frequency will be checked.
- Ask whether AVR and sensing circuits can be tested.
- Confirm that excitation components can be evaluated.
- Ask whether winding continuity can be checked.
- Confirm that insulation testing is available where required.
- Ask whether bearings and vibration will be inspected.
- Request post-repair output and load testing.
Trust Points for Professional Alternator Repair
A dependable alternator repair process should combine electrical measurements, mechanical inspection, correct parts identification, and final performance verification.
- Engine speed and frequency verified
- Alternator output measured directly
- AVR and sensing circuits checked
- Excitation system inspected
- Winding condition evaluated where required
- Insulation condition tested appropriately
- Bearings and vibration assessed
- Terminals and breaker connections inspected
- No unnecessary parts replacement
- Generator output verified after repair
Safe Alternator Electrical Inspection
Generator alternator testing can involve dangerous electrical voltages, rotating components, stored energy, and hot surfaces. Detailed testing should be performed by qualified personnel using suitable test instruments and isolation procedures.
Users should not touch exposed alternator terminals, internal AVR connections, or rotating components while the generator is operating.
Electrical Testing Before Repair
Before components are removed, technicians should record relevant voltage, frequency, continuity, and resistance information where practical.
This creates a useful baseline and helps confirm whether the eventual repair has restored normal electrical conditions.
Winding Inspection Before Rewinding Decisions
Visible winding discoloration does not always mean complete rewinding is automatically required. Resistance, insulation condition, continuity, and actual electrical performance should be evaluated.
Major winding repair decisions should be based on confirmed damage rather than appearance alone.
Post-Repair No-Load Testing
After alternator repair, the generator should first be tested without significant electrical load. Voltage, frequency, sound, vibration, temperature, and control-panel indications should be reviewed.
No-load testing helps confirm that voltage builds correctly before heavier demand is applied.
Load Testing After Alternator Repair
The alternator should then be tested under suitable electrical demand where appropriate. A repair that appears successful without load may reveal weakness when current increases.
Conditions to Monitor During Load Testing
- Voltage stability
- Frequency
- Phase balance where applicable
- Electrical current
- Alternator temperature
- Bearing noise
- Vibration
- Terminal temperature
- Control-panel warnings
Check Voltage Recovery as Load Changes
A healthy alternator and voltage-regulation system should respond appropriately when electrical demand increases or decreases.
Slow recovery, excessive voltage drop, or unstable output may indicate that the repair requires further investigation.
Monitor Alternator Temperature After Repair
Temperature should remain within suitable operating conditions. Abnormal heating after repair can indicate excessive electrical load, cooling restriction, winding problems, poor connections, or bearing issues.
Temperature should be checked during extended testing rather than only immediately after startup.
Check Bearing Condition After Repair
If alternator work involved bearing removal, rotor movement, or mechanical disassembly, bearing sound and vibration should be checked carefully during recommissioning.
Mechanical alignment and smooth operation are essential for long-term alternator reliability.
Operating Environment and Alternator Reliability
Alternator performance can be influenced by local operating conditions such as heat, dust, humidity, long running hours, vibration, and electrical loading.
Commercial and industrial generator users should adjust inspection frequency according to actual environmental and operating conditions.
High Ambient Temperature
High surrounding temperature reduces the alternator’s ability to release heat. When combined with heavy electrical demand or poor airflow, winding and bearing temperatures can rise significantly.
Cooling and ventilation should therefore be considered when investigating alternator failures that occur after extended operation.
Dusty Operating Conditions
Dust can restrict ventilation and settle on electrical insulation and terminals. This may increase operating temperature and reduce long-term reliability.
Alternator ventilation openings and accessible internal areas should be kept reasonably clean.
Humidity and Moisture
Moisture can contribute to low insulation resistance and corrosion of terminals or windings. Equipment exposed to humidity or long standby periods may require insulation testing before heavy use.
Long Generator Operating Hours
Extended generator use increases thermal and mechanical demand on alternator windings, bearings, ventilation systems, and electrical connections.
Operating-hour records can help determine when deeper alternator inspection may be appropriate.
Repeated No-Output Faults
If the generator repeatedly loses output after previous repairs, the root cause may not have been fully corrected.
Repeated failure can indicate unresolved heat, excitation, wiring, bearing, overload, or internal alternator problems.
Common Diagnostic Mistakes
- Replacing the AVR without electrical testing
- Replacing the complete alternator before checking the breaker
- Ignoring generator frequency
- Failing to measure voltage directly at the alternator
- Overlooking loose sensing wires
- Ignoring residual voltage information
- Failing to inspect excitation components
- Ignoring bearing noise or vibration
- Skipping insulation testing when required
- Returning the generator to service without load verification
Preventive Alternator Maintenance
Routine inspection can help reduce unexpected no-output failures and identify developing problems earlier.
- Monitor generator voltage
- Check operating frequency
- Inspect alternator terminals
- Check AVR and sensing connections
- Keep ventilation openings clean
- Monitor alternator temperature
- Listen for bearing noise
- Watch for increasing vibration
- Avoid excessive electrical loading
- Record recurring electrical faults
Keep Alternator Repair Records
Alternator faults and repairs should be documented in the generator maintenance history. Good records make future diagnosis faster and can reveal patterns that may otherwise be overlooked.
Useful Information to Record
- Date of fault
- Generator operating hours
- Voltage before repair
- Frequency
- Fault symptoms
- AVR findings
- Excitation test results
- Winding or insulation findings
- Parts replaced
- Post-repair voltage and load-test results
Guidance When the Alternator Stops Producing Power
If the engine runs but no electrical output is available, first note whether the control panel shows any voltage, whether the breaker is open, whether frequency is normal, and whether the problem occurred suddenly or after a load change.
Also note any burning smell, unusual alternator noise, excessive heat, recent electrical repair, or previous voltage instability. This information can help a technician narrow the fault more efficiently.
Do Not Continue Operation With Serious Warning Signs
If the alternator is producing smoke, severe electrical smell, grinding noise, excessive vibration, or extreme heat, the generator should be shut down and inspected.
Continued operation can turn a repairable component fault into more extensive alternator damage.
Restore Reliable Generator Electrical Output
A generator alternator not producing power fault can involve the AVR, sensing circuits, excitation system, residual magnetism, rotating rectifiers, brushes, rotor or stator windings, bearings, terminals, breaker, or connected electrical path. Accurate diagnosis should determine exactly where electrical generation or power transfer is being lost before repair decisions are made.
If your commercial or industrial generator engine runs but produces no usable power, very low voltage, intermittent output, excessive alternator heat, unusual bearing noise, or repeated electrical faults, arrange a professional alternator inspection. Systematic testing, suitable corrective work, accurate component replacement, and controlled post-repair load testing can help restore reliable electrical output and improve long-term generator operating confidence.